How do you start sewing on a machine? How to learn to sew on the machine? Learn exercises to start learning to sew on the machine!
How do you start sewing on a machine? How to learn to sew on the machine? Learn exercises to start learning machine sewing!
Are you just wondering how to learn to sew? Do you dream of creating your first pieces, but still don’t know where to start learning? You can go to a land line Machine sewing cycle For beginners or try your hand at our guide. From reading it you will learn How to sew on a machine step by step, You will master Machine sewing basics.
Sewing on a machine – do you need talent?
Often this way you think of people who have already reached a certain level in a certain field and are easy to carry out activities related to it. What is commonly called talent is the willingness to perform certain activities and the hundreds of hours you spend on training. So don’t wonder if you are talented enough to get started, but if you want to learn to sew, just start sewing. sewing for beginners Nothing really difficult. We hope this article helps you get the basics down quickly, and as you develop your skills, you’ll love sewing as much as we do.
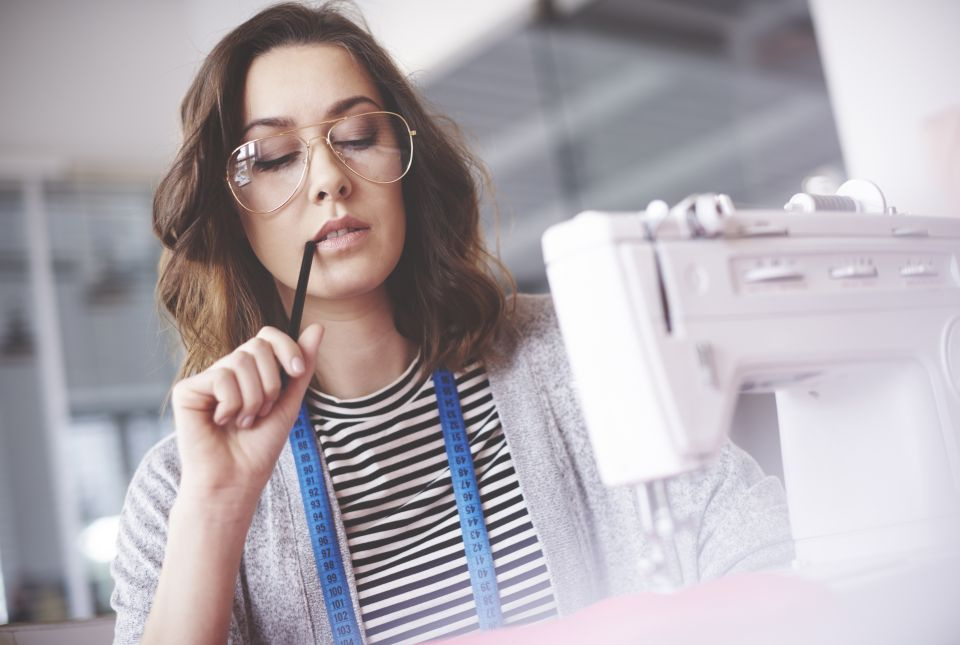
How do you start sewing on a machine?
You can not do without a sewing machine. If you don’t have yours yet, ask between family or friends first – there may be someone close to you Sewing machine He will gladly lend it to you. If you have been dreaming of sewing for a long time and already have your own machine, now is the time Learning how to sew. Prepare your gear, check out our article on the basics of using a sewing machine, and learn how to sew on a sewing machine with us.
See also:
How to learn to sew on the machine?
At first, you only need sewing machines (You don’t even have to sew it up) and a sheet of checkered paper. Place a sheet of paper under the presser foot, lower it, select the straight stitch on your machine and begin sewing along the line. Depress the pedal sensitively and use both hands to guide the paper. Sew a few lines parallel in this way, then check if your line خط straight seams And running at equal intervals of each other. It is important to be able to maintain the same distance from the edge, because when sewing clothes or accessories, you must keep the seam allowances the same width in certain sections.
If you’ve mastered the first exercise, it’s time for the next challenge. On a new sheet of paper, draw any lines (arcs, swings, waves, loops) and try to sew along their lines. In places where you will have relatively large curves, sew more slowly, and if it is not enough to fit the path, stop sewing with the needle down (stuck in the paper), lift the presser foot, turn the paper over, lower the iron foot and continue sewing. Perform this maneuver as many times as necessary. You should do the same for sewing in the corners. When you’re done sewing to the end of the line, stop the needle at the corner post, lift the presser foot and roll the paper, then lower the presser foot and continue sewing. How does it come out? If so, it’s time to practice the material.
Learn to sew on a machine – exercises using the material
Do you know how fabric is different from knitted fabric? Simply put, the fabric is woven from weft threads (crosswise) and warp threads (lengthwise), while knitted fabric is made of successive rows of stitches (as in jackets). The fabric is a stable material, the knitted fabric is stretched. So, to sewing lessons Fabric will be the best material. Prepare pieces of fabric of medium thickness, preferably monochromatic cotton (The shirt fabric is very thin, while jeans are really thick, so find something in between.) Machine thread a contrasting thread and attach a needle to sew fabrics (if you need more information, see our needlepoint guide here).
Now do the same exercises as with the piece of paper. First sew a few stitches parallel to each other and then sew a few more vertically. However, don’t draw instructions for sewing the trellis, but this time use the edge of the presser foot (and in the case of the first seam – one of the lines on the needle pad) to guide the fabric straight. do you see? It’s so easy! If you have already mastered sewing with straight lines on the fabric, prepare more pieces of fabric on which you can draw cool lines with a felt-tip pen or a tailor’s chalk (they can be just like those on a sheet of paper). Practice sewing along these lines using the previously described sewing tips for rounds and corner angles.
How to learn to sew directly on the sewing machine?
To easily guide the fabric while sewing, use the guide lines on the needle plate. Each of them indicates a specific width in which a seam is created from the edge of the material. Support the sewn fabric with both hands, in most cases only to the front of the presser foot. If the seam begins to fall off the line during a drill or target sewing, do not pull the fabric while sewing to correct it – this can break the needle and damage the machine. In such a case, patch the seam gently and delicately, and when you sew your first stuff, it is best to stop sewing where the seam came out crooked, scrape off the piece and sew again.
Sewing machine for beginners – basic stitches
While sewing on the machine, the most commonly used stitches will be straight stitch.
However, modern home sewing machines have many built-in stitches, some of which are worth getting to know at the beginning of your sewing and testing adventure:
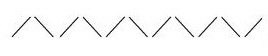
– zigzag – A regular zigzag stitch will be used when sewing elastic fabrics, but it will also be useful when trimming stock seams. Its width must be adjusted according to the thickness of the sewing material, which is often related to its hardness. The rule is that the stiffer the sewn fabric, the wider the stitch width should be;
– multi-stitch zigzag – This is a stitch often used to sew underwear, elastic bands, or bathing suits. It is used for suturing the gums or finishing edges. The machine sews it so that when it is sewn in one line, the needle makes three jumps and then changes direction, creating a broken zigzag line;

– Reinforced straight stitch – This stitch is used for sewing elastic fabrics, but also for sewing in places subject to high tension – often used at crotch seams, and can also be used to sew sleeves into the armholes. When sewing with this stitch, the machine performs one needle stroke forward, one backward, and one forward again. The seam obtained in this way is very durable and very elastic.
Now practice sewing with these stitches, change their width and length settings and note how the fabric behaves. However, remember that each time you sew a new item, it is a good idea to make a sample of the stitches on the pieces of fabric you will be sewing from. There is no one setting that is perfect for all types of materials.
How to sew on the machine? – Starting and ending a petition
Proper stitching starting and finishing is important to the comfort of work and the aesthetics of the final product. In order to sew a seam properly, there are a few things you need to remember (but only in the beginning; you will do these steps automatically over time):
– start of petition – Put the fabric under the presser foot and lower it; Hold the ends of the two threads with your left hand (which comes out of the needle and the bobbin case), and hold the fabric with your right hand; Now you can start sewing (it is enough to grab the threads literally two or three strokes with a needle). This way, you’ll avoid the thread getting tangled at the beginning of the seam or the thread running out of the needle at the start of sewing.
– end of petition – When you reach the edge of the fabric or where you want the seam to end, stop the machine, then use the handwheel to set the needle to the highest position (it faces you); In computers, the needle moves to this position automatically. Lift the presser foot and pull the fabric diagonally to the left and back (pull it forward, the needle may flex or break). Cut the thread not close to the needle, but about 10 cm from it. This way, you’ll prepare the threads for sewing the next section and avoid situations where the thread escapes from the needle.
Securing the seam against tearing, i.e. locking
Before you start sewing your first thing, you need to familiarize yourself with the concept of a lock. Its purpose is to prevent the seam you make from fraying right after you’ve stitched it. When sewing by hand, knots are made at the beginning and end of the seam, while with machine sewing, the seam is interlocked. In mechanical machines, a lever for reverse stitching is used for this, in computer machines – a button for reverse stitching. The lock is done at the beginning of the seam so that the sewing begins below the point where the seam should begin (about 1 cm), make a few strokes with the needle in the opposite direction, release the lever or press the back button and sew forward. To bartack at the end of a seam, sew the fabric to the bottom edge of the fabric or to the point where the seam ends, stop sewing, hold down the reverse sewing lever or press the button and make a few needle strokes in the opposite direction. The seam installed in this way will not rip when turning the sewn item inside out or when using the finished product.
Read also:
Machine Sewing for Beginners – Tips for First Sewing
As you see, Learn to sew on the machine Nothing difficult. Now you know, How to operate the sewing machine and How to perform the basic but most important activities on them. You can successfully start creating your first stitches. For starters, it might be cushion cover with insertA bag for vegetables, a bag for small things or the simpler one shopping bag. You will need a small amount of fabric and basic machine sewing skills to sew each of these things. If you feel confident when sewing accessories or prefer to face the sewing of clothes, we advise you to sew the simplest skirt on an elastic (to sew it, you need only a rectangle of fabric in width and also taking into account the length of the skirt. As a spare and spare seams for the backing, as well as elastic, which will also be a belt). When you feel confident here, it’s time to use the ready-made patterns. In this case, our warehouse will help “Step by step sewing”, With whom will you make your first clothes and learn the next sewing secrets.

“Music specialist. Pop culture trailblazer. Problem solver. Internet advocate.”


